


Grab your fave leggin pattern that you know fits the intended bootleg leggin wearer! My two faves are Ottobre 1/2007* and the Riviera leggin from Nancy Langdon's book Sewing Clothes Kids Love.
The Otto 1/2007 is a shorter length though, so you will have to lengthen. I have used Riviera here.

Left is the pattern that came with the book, trimmed and then I have reinforced it with iron on interfacing. On the right is a trace off of the pattern. This is the one we will play with.
This leggin pattern has no side seam, but we need to get it back in order to get our flares happening on both sides of the leg. So...

I pretty much follow the grain line already added by Nanc, and I cut it up to make two pieces. A front and back.
Now guess-timate where the childs knee would go...and mark on either side of the leg on both pattern pieces. This is where our flare will tape back to.

Now to cut them out!
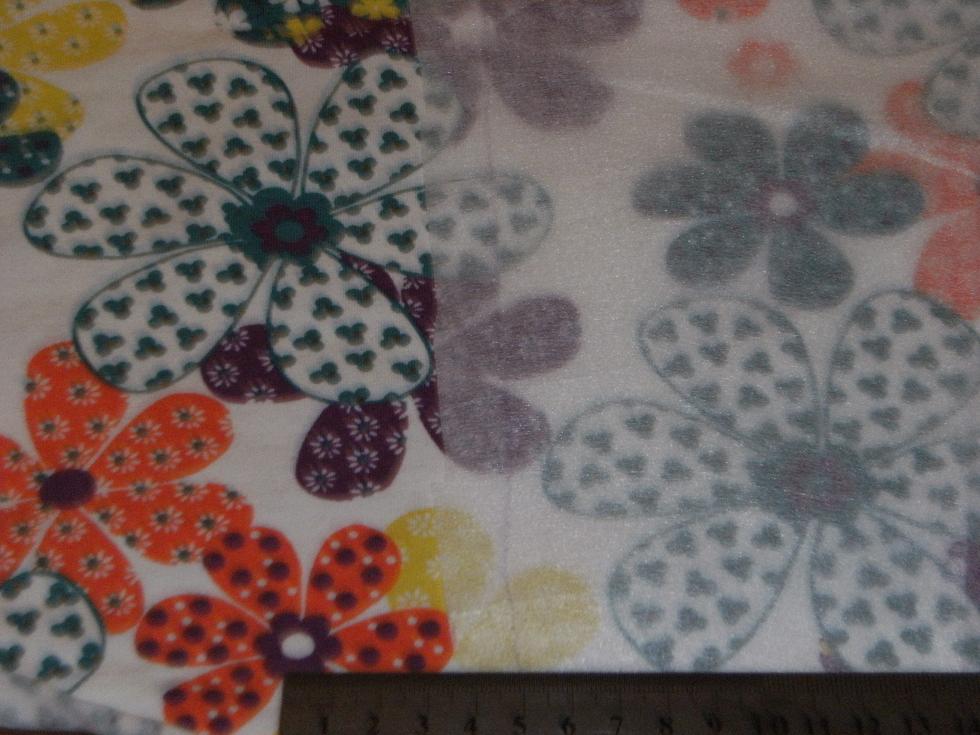
The best fabrics to use for leggins are those with 4 way stretch. This will emilinate those baggy knees and bums. Look for a fabric with cotton/spandex or cotton/elastine or cotton/lycra mix. Great fabrics from the Crafty Mamas shop are Stella, the range of Campan knits by Hilco, Stenzo knits, Mad Sky, Flap Happy just to give some ideas. I am using a very groovy Mad Sky Dazzling Daisies print.
Now, place your pattern pieces on your fabric...with the rib lines running vertical down the pattern.

Now, at the very bottom of the leg piece...grab your trusty ruler and measure out how far you want your bottom flare to be. I have gone for 5cm for a 6 year old. Chalk mark where 5cm is from side seam of pattern. Do the same on the other side of the leg, then the same on the other pattern piece.
Now...to make our flare. This is the one pic I took that screwed up!
So I'll have to talk you through it, easy peasy though. Place one end of your ruler at the knee mark. Then angle it back down to your 5cm mark. This will extend beyond the orginal seam line. Draw this new flare in. Do on the other side and also on both sides of the other pattern piece. It will look like this when cut out. ** Remember to add your seam allowance.

Simple.Now following your leggin instrutions..go sew them up! Here's mine..


I used to put a snippet of Farbenmix ribbon in the back centre seam so the kids know back from front, I also sometimes put a strip on the front like this....cool huh?
Next I'll do a bit of a grunge up of the leggin pattern...
Happy Sewing!
Lisa :)
2 comments:
Oh I love this, thank you. Am wanting to make some of these for my daughter now that the weather is getting a bit warmer but still chilly. These will be perfect as so comfy. Ok a project for me for this weekend !
Thanks for the post! I have made leggings, but never with a boot-cut. I've got to try this!
Andrea
Post a Comment